home about me recipes morsels
Showing posts with label recipes. Show all posts

Monday, September 14, 2015

Perfect Pizza Pasta

We are full swing in school mode over here and desperately trying to find our groove with our new routine since returning to work after a busy summer and maternity leave.  As you know, when it comes to the day to day grind - I am all about anything that saves a little bit of time.  This recipe is no exception.  It is super easy to throw together, can be eaten warm or cool and can be customizable to your child's (and your) individual taste.  This recipe is also a perfect way to use up some leftover veggies you have in your fridge and introduce them in a fun way to get your kiddos excited!

Last week, Benjamin moved up to a preschool classroom at school (wahhhh, where has the time gone!?).  He is absolutely loving his new class and enjoying his new teachers and new room (with all new toys!).  At home, I have had to adjust the way I pack his lunch as well. With this new class, they no longer heat up the children's lunches - which is a major adjustment for us since all of my boys love a warm lunch! (Yes, my husband takes a warm lunch almost everyday).  Until I can find a thermos that works well for his lunches, I'm trying to stick to a main course that travels well, is fun to eat and can be eaten cold/room temperature.  I found some really handy (and thin) ice packs which fit perfectly in our personalized Pottery Barn lunch boxes.  (FYI - to keep the box as cool as can be, I use two of these ice packs in the zipper pouch of the lunch box)

I have recently started purchasing turkey pepperoni and Benjamin is a huge fan.  It makes for a perfect snack and also travels very easily. A week or so ago, we had homemade pizza night and Benjamin had such a blast helping add the toppings to the pizza.  I had some left over toppings so I decided to add some pasta for a new family favorite.  This recipe is a lot of eyeballing and really adding whatever your heart (and tummy) desires.  The best part of this recipe, is that you can make it different every time.  You choose a few options from each of the main ingredient categories and mix and match!  This is a wonderful way to engage children in the process of preparing food.  Toddlers especially love helping in the kitchen and by encouraging this you, in turn, get them excited about helping pack their lunch.  The more fun you make these experiences for them, the more excited (and proud!) they will be to open up their lunch box and scarf their meal down.

I hope your kiddos love this recipe and it puts a smile on their face!  The possibilities are endless... have fun with it!

 photo IMG_0813_zpsdn1vtyg2.jpg

Perfect Pizza Pasta

Basic ingredients:
Pasta + Meat + Veggies + Cheese + Sauce

PASTA options (cooked and cooled) -
Wheat/Whole grain pasta
Cheese tortellini
Veggie pasta

MEAT options (cooked, cooled and chopped) -
Turkey pepperoni
Mild Italian sausage
Chicken sausage
Ground beef
Ham cubes

VEGGIE (and one fruit!) option -
Mushrooms
Cherry tomatoes
Peppers
Black Olives
Pineapple
Scallions
Yellow/Red Onion (chopped)

CHEESE options -
Mini mozzarella balls
Mozzarella chunks
Cheddar chunks (white or yellow, mild or sharp)
Pepper Jack chunks (for a little spice)
Monterey Jack chunks

SAUCE options -
Marinara sauce
Meat sauce
Pesto
Alfredo sauce
White sauce (garlic + butter)

Combine all desired ingredients in a bowl until blended and Mangia!
 photo IMG_0812_zpskv3rfdvn.jpg
Pin It!

Tuesday, August 25, 2015

Make Ahead Muffins

I feel like I've hit the mommy jackpot with this recipe.  Not only is it healthy and delicious but it is a major time-saver - and these days, those types of things are certainly speaking my love language.  Also, this recipe is geared towards mini muffins which makes them really easy to pack in lunch boxes and to hold in little hands.  The original recipe is from one of my go-to toddler cookbooks:  "Baby & Toddler - On the Go." I have slightly modified the recipe for our taste.

 photo 5F22EAA8-D5E5-4D48-A9CF-E873CC799019_zpsgt5xg7fb.jpg

The concept behind "make-ahead" muffins is the master muffin dry mix!  This recipe makes four separate batches of 14-16 mini muffins OR two batches of 24 muffins.  You mix all of the dry ingredients together and store in an airtight container in the fridge.  Having the dry mix already taken care of allows me to throw together (and bake) fresh muffins for toddler breakfasts + snacks in less than 20 minutes - each week.  I modify the flavor every week using different mix-ins which keeps those little toddler taste-buds excited!  This recipe is also perfect for baking and freezing - which comes in especially handy when we are away traveling for the weekend and our Sunday prep is non-existent.

As mentioned in my lunchbox post - last week I made banana cinnamon.  This week, we had some extra carrots and apples from our CSA box, so I decided to make some apple carrot spice muffins.  Both, as expected, were a big hit and it just warms my heart when Benjamin asks for muffins and tells me how yummy they are - "so good, mommy, so good in my tummy!"  I hope these are a hit in your house as well!

 photo 40570BDB-127D-4E1D-BA7F-AE759C91143C_zpspjjtdmr3.jpg
_____________________________________________________

Make-Ahead Muffins:

Makes 4 batches of 14-16 mini muffins or 2 batches of 24 mini muffins

Master Muffin Dry Mix:
1 and 1/2 cups all-purpose flour
2 cups whole wheat flour
3/4 cup wheat bran
4 teaspoons baking powder
1 teaspoon baking soda
1/2 teaspoon salt
3/4 cup light brown sugar

Whisk together all ingredients in a bowl until well blended.  Store in a plastic ziploc bag in the refrigerator for up to a month.

Banana Cinnamon Variation (Wet Mix):
1 large egg, lightly beaten
2 tablespoons canola oil
1/4 cup plain-whole milk greek yogurt
1/2 teaspoon pure almond extract
1/4 teaspoon ground cinnamon
1/2 cup mashed banana
one cup master muffin mix

Apple Carrot Variation (Wet Mix):
1/4 cup shredded carrot
1/4 cup diced apple
1 large egg, lightly beaten
2 tablespoons canola oil
1/4 cup plain-whole milk greek yogurt
1/4 cup applesauce
1/2 teaspoon pure vanilla extract
1/4 teaspoon ground cinnamon
1/8 teaspoon pumpkin pie spice
one cup master muffin mix

Preheat the oven to 400*F.  Spray a 24-cup mini muffin pan with cooking spray or line with paper liners.

In a bowl, beat together the wet ingredients.  Add the master muffin mix and stir until just evenly moistened.  The batter will be thick.

To ensure even distribution - use a medium (1.5 tablespoon) cookie scoop to portion batter into the prepared muffin cups. Bake until the muffins are golden brown and a toothpick inserted into the center of the muffin comes out clean - approximately 13 minutes.  Let the muffins cool in the pan on a wire rack for about 5 minutes, then transfer to the wire rack to cool.

Store in an airtight container in fridge for one week and/or seal in a Ziploc bag and freeze for up to 3 months. Enjoy!

NOTE:  If you are making just one batch of this mix and using a 24 mini muffin cup pan you will have empty cups (since a single recipe usually yields approximately 14-16 mini muffins).  For each empty cup, fill half way with water as to ensure even cooking for the filled cups and also not to ruin your pan! :)

Click here for a printable version of this recipe.
______________________________________________________

Until next time... I'll leave you with this delicious morsel! #nomnomnom

 photo 35B4C1AA-CBCA-4862-A76B-638427ECCF06_zpsrdolzazd.jpg
PS:  This post is not sponsored; it simply contains a few of my all-time favorite products in which an occasional Amazon affiliate link may be associated.
Pin It!

Monday, August 17, 2015

School Lunch 101 - A Look Inside Benjamin's Lunchbox

This post is dedicated to all the moms out there trying to figure out what lunch/snack options to send their kiddos to school with. It's also dedicated to the stay at home moms that are in the lunch time rut and need a few fresh ideas to spruce things up. Occasionally, I'll post pictures over on my IG feed of the contents of Benjamin's lunchbox. Most often times, I get a handful of questions about what I pack and inquiries about recipe ideas to share. I thought this would be a good place to share that information as I know I am always curious as to what other moms pack for their kids lunches/snacks. Benjamin has been going to daycare since he was three months old. A few months later he started on fruit and veggie purees and I started making and sending those as well. Fast forward two years... and now we are well into the toddler food world. My motto on feeding wee ones is - variety! While we have main staples that I send in his lunch box everyday, I add variety consistently. Are their times when he doesn't care for what I've sent for him? Sure! My answer for that most often times it to keep sending it. Things he likes today, he's over tomorrow. His mind is a tornado at this age so I certainly don't give up when he tells me "mommy, me no like!" Most often times when I try again, it's a hit. This has allowed us to continue eating all of the wonderful variety of things in our home that we love without having to create additional meals every night for a super picky eater. 


When it comes to planning out the lunchbox meals for the week, I always try to incorporate our family meals as well. I share ingredients as much as possible and try to optimize our shopping. We don't like throwing away food in our family. To such a point, in fact, that I've dubbed my husband our "human garbage disposal." 


So here we go on our lunchbox adventure! I hope you find this the slightest bit helpful! 

The Main Categories I try to stick to: 
  • Yogurt 
  • Fruit 
  • Veggie 
  • Cheese 
  • Protein 
  • Grain/Carbs 
  • "Treat"/Snack/"Fun Food" 
On the Menu (Last Week/This Week): 

Yogurt - 1 4oz container each day, alternating flavors. We have been eating the Trader Joe's Organic yogurts in the following flavors: blueberry, vanilla, mango, peach, strawberry and banana. 

Cheese - 1 stick per day. This week I sent him with cheddar sticks. Last week I sent him with Colby jack sticks. 

Fruit - 1 4oz container of chopped fruit. I usually put two types of fruit in each container. This week was strawberries/raspberries and strawberries/donut peaches. Last week was strawberries/blueberries and blueberries/peaches. 

Veggies - 1 4oz container of steamed veggies. Benjamin is not a huge fan of raw veggies so I steam almost everything for him, but if your child likes raw veggies you can substitute those... which certainly makes for easier prep! Last week I alternated with fresh green beans and sweet potatoes. This week we are alternating between fresh green beans and broccoli. 

Main Lunch - Last week I alternated between homemade creamy broccoli mac+cheese and 1/2 chicken cutlet sandwich on 12 grain bread. This week I am alternating between whole wheat pasta with tomato sauce, Parmesan + sausage (leftover from our sausage and peppers night) and Spanish rice + Mexican pork (leftover from our grilled stuffed burrito night). 

Lastly, I supplemented with alternating flavors of GoGo Squeez last week and homemade banana cinnamon whole wheat muffins this week. These mini muffins also fit perfectly in my favorite 2 oz containers (link below). 

Notes: 

I absolutely love love love these containers - both the 2oz and the 4oz.  We have had them for over 2 years and have never had to replace them. They are sturdy, affordable and best of all - dishwasher safe!! 

All contents of Benjamin's lunchbox must be labeled each and every day. To make it easier, I purchased dishwasher safe labels from Name Bubbles and labeled all of my 2oz and 4 oz containers. I use a piece of masking tape with his name hand written - on the yogurt, cheese stick and other pouches or baggies. 

There are a bazillion types of lunch boxes out there, but we personally love the lunch boxes from Pottery Barn that are personalized with their first name on the front. I purchase them during a sale that also includes free shipping! 

I'll be back in a few days to share a super simple baking time saver AND the recipe for the homemade banana cinnamon whole wheat muffins! So easy, nutritious... and tasty, too! 

Please feel free to leave me a comment or a message and let me know if there is anything you would like to see me elaborate on or cover in a future post. I'd love to hear from you!


PS:  This post is not sponsored, just a list of some of our favorite products.  A few Amazon affiliate links may be included.
Pin It!

Friday, August 22, 2014

Blueberry Zucchini Bread with Coconut Crumb Topping

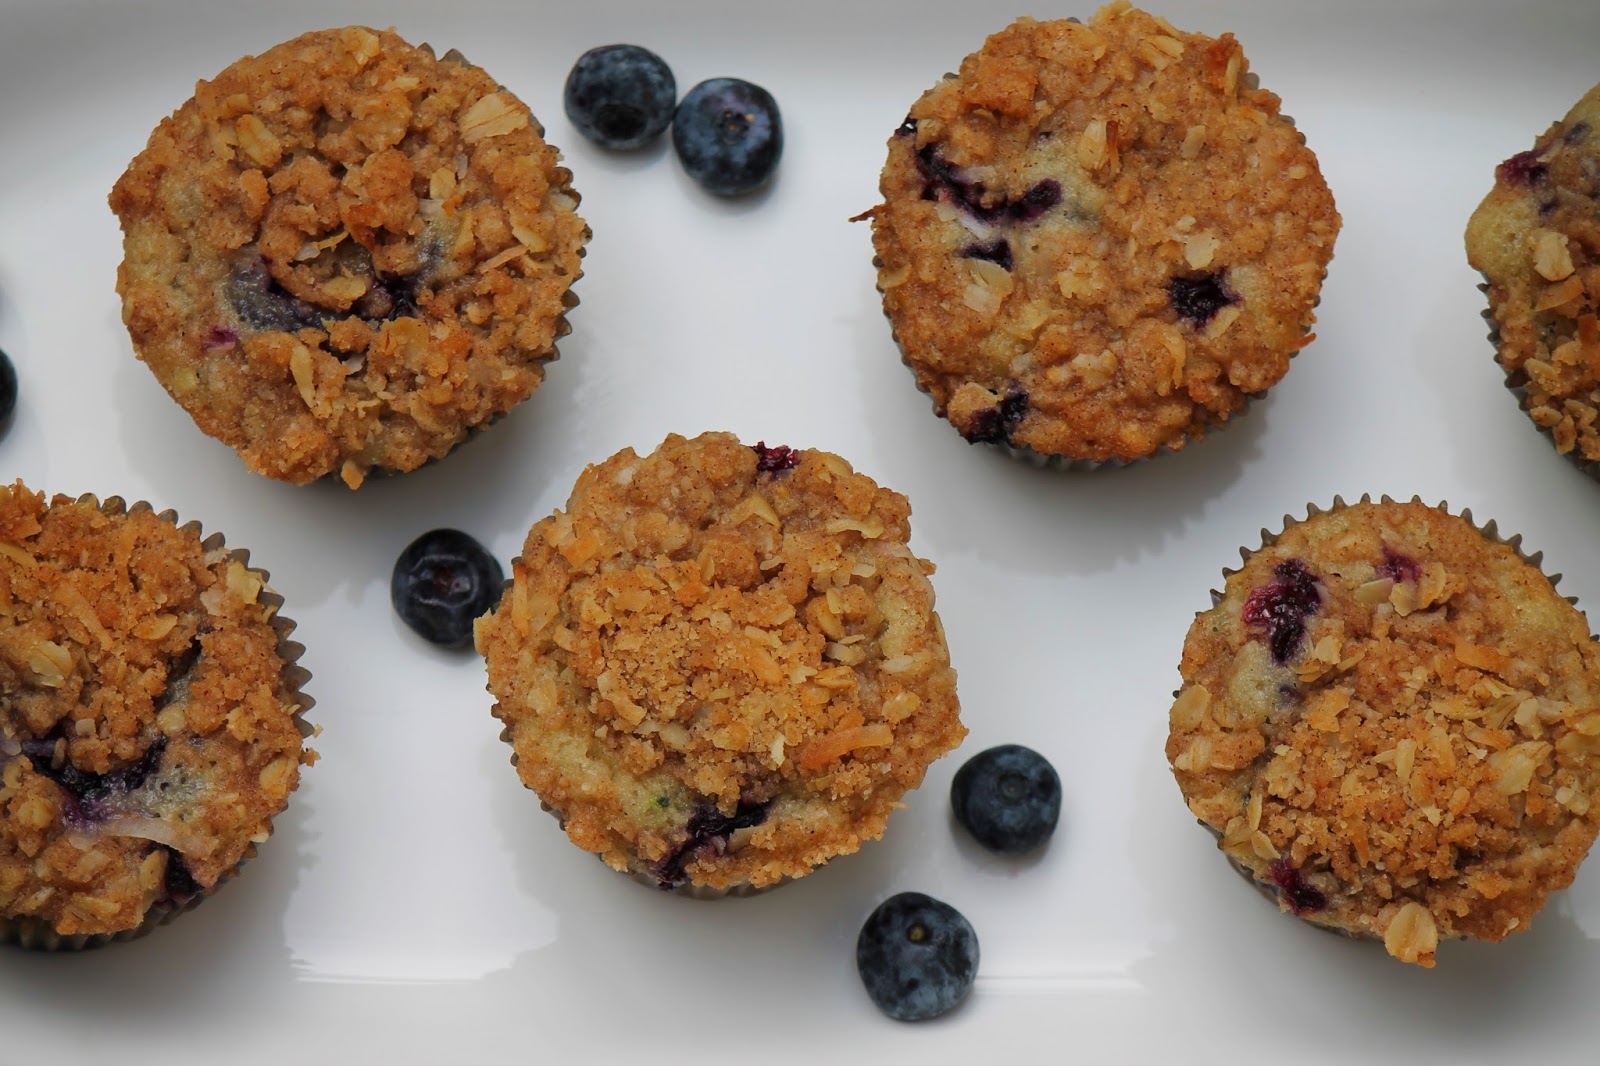
Zucchini bread and blueberry muffins are two of my all time favorite treats - and there is no better time to make both recipes than right now! This time of year our garden is usually overflowing with zucchini; fresh blueberries are plentiful at our local farmers market (or in my in-laws back yard!).  While I love both recipes independently, last year I decided to try to morph the two.  The result was nothing less than amazing... and the rest is history.

Blueberry Zucchini Bread with Coconut Crumb Topping

Makes 24-30 medium sized muffins or 4 medium sized loaves or 2 large loaves

Bread/Muffin Mix:
3 eggs
2 cups shredded zucchini
1 cup vegetable or canola oil (feel free to modify to 1/2 cup applesauce, 1/2 cup oil)
2 cups granulated sugar
1-2 teaspoons lemon zest
3 teaspoons pure vanilla extract
3 cups all-purpose flour
1 teaspoon baking powder
1 teaspoon salt
1/4 teaspoon baking soda
2 teaspoons cinnamon
1/2 cup sweetened shredded coconut (optional)
2 cups (or 1 pint) fresh blueberries

Crumb Topping:
1/2 cup quick or old fashioned oats, uncooked
1 cup all-purpose flour
1 teaspoon cinnamon
1 cup light brown sugar
2/3 cup unsalted butter, chilled and diced
1/2 cup sweetened shredded coconut

Preheat oven to 350 degrees F.   Line muffin tins with cupcake liners or spray loaf pans with non-stick cooking spray.

Mix together the eggs, zucchini, oil, granulated sugar, lemon zest and vanilla extract until well combined.  In a separate bowl - combine flour, baking powder, salt, baking soda and cinnamon.  Gently pour dry ingredients into wet mixture and stir until incorporated.  Fold in coconut (optional) and blueberries.  Pour into paper lined cups (3/4 full) or into greased loaf pans.

For the crumb topping:  pour all ingredients in a bowl and mix together using a fork or pastry cutter.  Mixture is ready when the ingredients start to hold together but crumble easily.  Place 1-2 heaping tablespoons crumb topping onto each individual muffin or split in four (or halves) if using loaf pans.

Cooking times will vary by oven (as always), but 20-25 minutes is usually perfect for my muffins, 35-40 minutes for my medium loaves and 45-55 minutes for my large loaves. Bread/Muffins are done when a toothpick inserted into center comes out clean.


Click here for a printable version of this recipe.
Pin It!

Tuesday, October 23, 2012

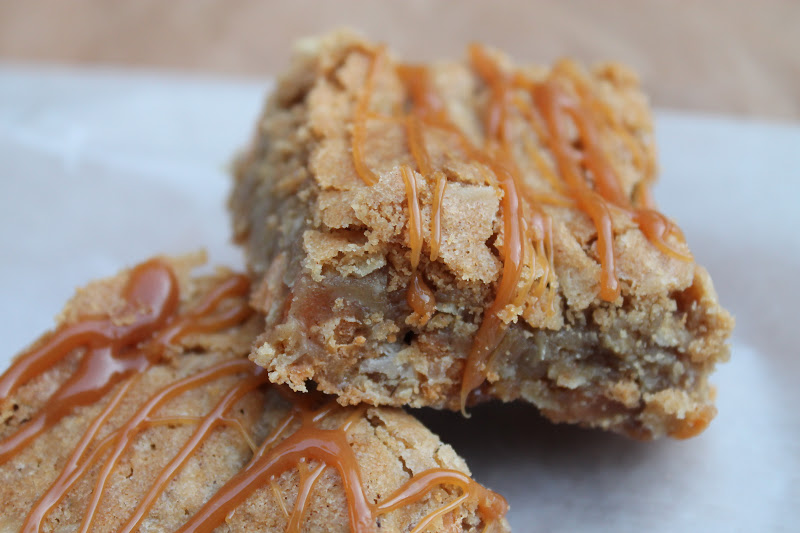
Oatmeal Butterscotch Cookie Crunch Bars

Today is a special day - my step-dad's birthday!  Steve is a wonderful guy and I am very lucky to be able to call him my dad.  It's a complicated story to explain how he came into my life, but - although we share no blood relation, he has and always will be my dad.  He has been there for me through thick and thin and stood by me in the tough times when others didn't.  My life has forever been changed because of him and Carl, Henry & I (little baby H too) love him dearly.

I'm sure it will come as no surprise to you that some of my fondest memories growing up with Steve involve food.  He has a sweet tooth like no other and I know I can always count on him for a taste of anything I make.  We have a lot of the same food similarities but one that I was never 100% sold on was butterscotch.  While I do enjoy a little bit every now and then, it's never been my top choice.  Steve, on the other hand, LOVES butterscotch.


Since his special birthday is today and I wanted to send him something that he loves - I decided to create a new recipe just for him.  As I was cutting these bars up and melting my caramel for the drizzle, the rebel inside of me snatched up some crumbs and I was blown away! These bars are delicious and so decadent.  The butterscotch just throws them over the top. I am seriously questioning why the heck my taste buds have fooled me for so long.


Even though these bars probably won't make it to Steve-o until tomorrow (darn snail mail) - I couldn't hold back sharing this recipe any longer.  Also, I'm pretty sure if I pushed this post off one more day - I wouldn't have anything left to photograph!  yes, trust me - that are that. good.


Oatmeal Butterscotch Cookie Crunch Bars

Makes 15-20 good sized cookie bars

2 sticks butter or margarine, softened
1 cup brown sugar, firmly packed
1/2 cup granulated sugar
1 tsp vanilla
2 eggs
1 and 1/2 cup flour
1 teaspoon baking soda
1 teaspoon pumpkin pie spice
1/2 teaspoon salt
2 heaping cups of quick or old fashioned oats, uncooked
3/4 cup butterscotch chips
1 and 1/2 cups caramel bits (1 cup for caramel drizzle and 1/2 cup to stir into cookie mixture)
1 cup of rice cereal
1 tablespoon heavy cream

Preheat oven to 350 degrees F.   Spray a 9 x13" baking dish with non-stick cooking spray.

Beat butter, brown sugar and granulated sugar together with mixer.  Add vanilla and eggs; beat well.  In a separate bowl - combine flour, baking soda, pumpkin pie spice and salt.  Add dry mixture into wet mixture and stir until combined.  Add oats, butterscotch chips  and caramel bits.  Once combined, gently add in rice cereal - stir and press into pan.

Bake for 30 minutes.  Cool on wire rack.  When completely cool, cut into bars and place evenly spaced on a wire rack.  Place wax paper under wire rack to catch caramel drizzle.

Heat the remaining cup of caramel bits with the tablespoon of heavy cream over medium-high heat.  Continuously stir until mixture is thin and runny.  Using a spoon, gently drizzle the caramel over cookie bars.  Let sit to set.  Enjoy!

Click here for a printable version of this recipe.  


Happy Birthday, Steve-o - I hope you enjoy your birthday treats. We love you and can't wait to see you soon!! xoxo
.................................................

Thank you to all of you who have submitted your comments/votes on the gender for little baby H.  I am loving hearing everyone's guesses - so keep them coming!  I have decided that the prize will be a gift card to either Starbucks or Dunkin Donuts - winners choice.

PS:  For those of you who have commented as unknown or anonymous, I have not published those comments.  If you'd like to be entered into this little contest - please make sure your name is either in the name field or the comment field.  I just want to make sure I know who to contact in case you are the big winner!


If you haven't voted - what are you waiting for!?  Click HERE to vote. 

.................................................

Lastly,  Today I am blogging over at CafeMom about my quest to find a good work/life balance.  Click HERE to go check it out!

Pin It!

Tuesday, September 25, 2012

Apple Treats and Baby Bumps

Happy Tuesday!

Today I am blogging over at CafeMom about sharing the big [baby] news with our family as well as my quest to find the perfect maternity clothesGo check it out!

In other news:

A little over two weeks ago - the sweet little baby growing inside my tummy was approximately the size of an apple.  In true cheesy fashion - Carl, Henry and I celebrated this occasion by going on our annual apple picking adventure! SO smahhhht I tell you!  It was, of course, the perfect opportunity for me to get my first bump shot for our little one's baby book.


The weather was gorgeous and we really had a wonderful time.  I made sure that I ate an extra apple cider doughnut for myself and the little one... I didn't want them to feel left out of our family tradition this year!  I also thought I was not going to be able to have my cup of fresh cider until I walked in the door and saw a huge sign saying that all of their cider was pasteurized.  I almost cried tears of joy.  After indulging in our treats, purchasing a few pumpkins and colorful mums - we lugged our half bushel of Macintosh and Cortlands home and got to making some of our favorite apple treats.

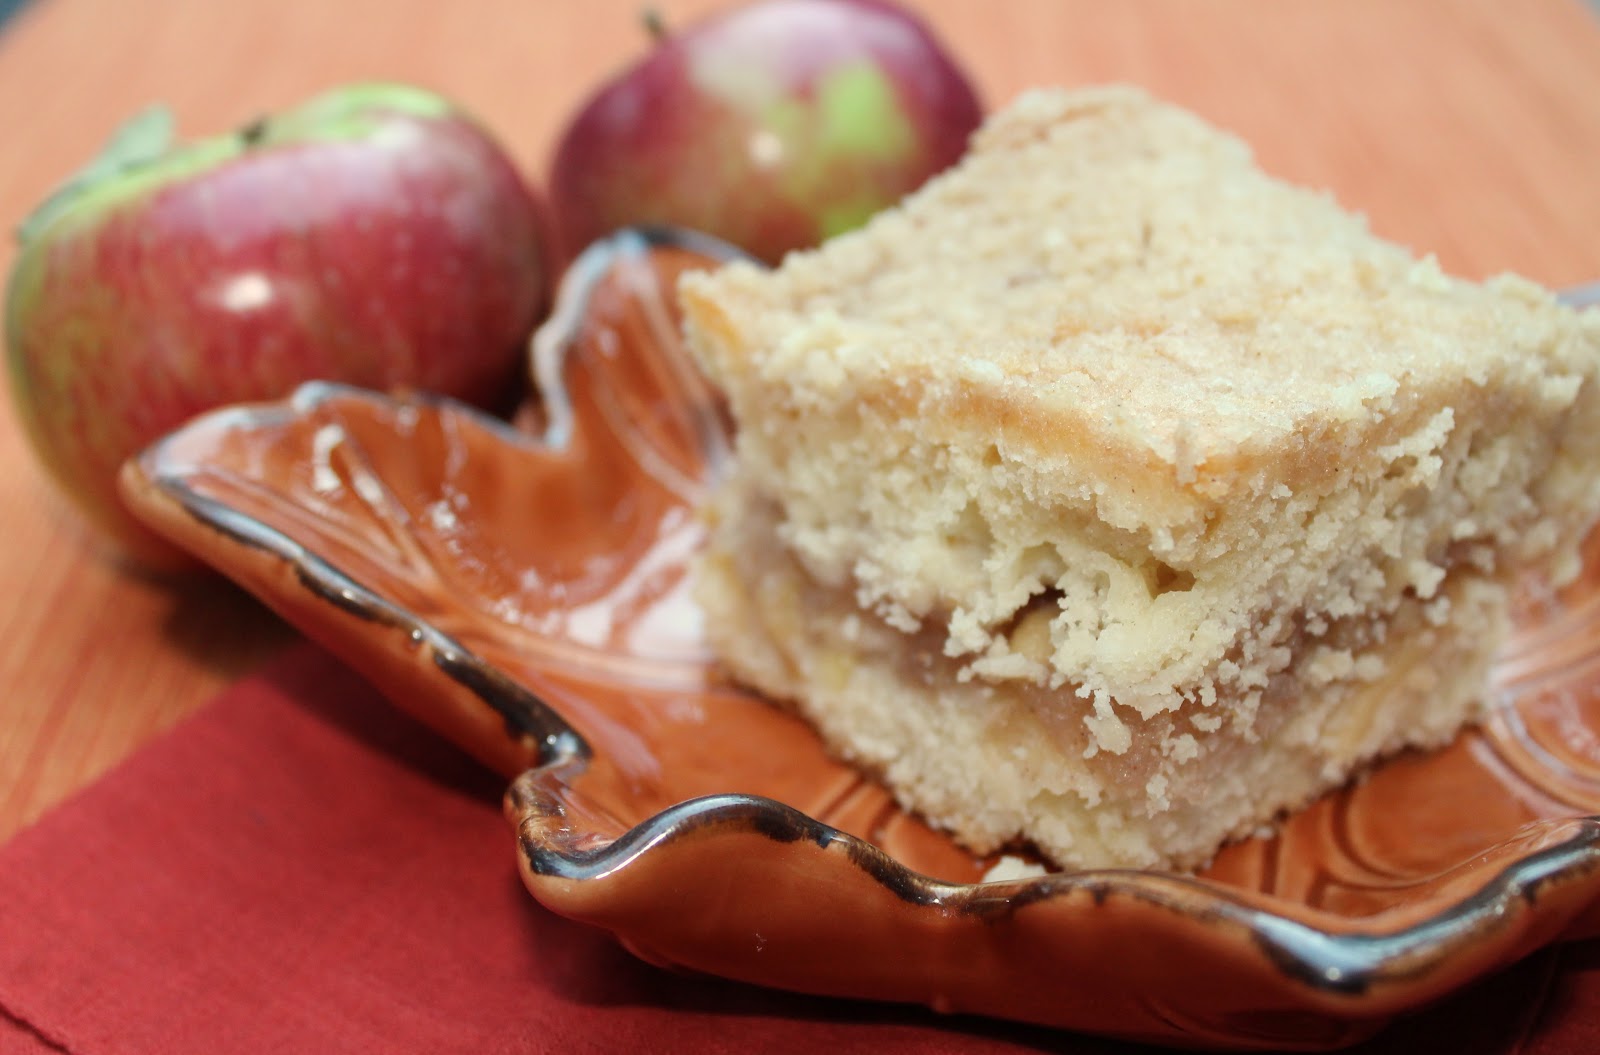
I just HAD to share my favorite apple recipe of all with my favorite people of all - YOU! yes you! If I can give you any advice about the recipe below it would be to stop whatever you are doing and get making this recipe RIGHT. NOW.  You (and your tummy) will be glad you did!

Apple Pie Coffee Cake
[Recipe modified from Taste of Home]

Serves 16-20

Apple Filling:
2/3 cup granulated sugar
1/3 cup cornstarch
4 cups cored, peeled and sliced
4 tablespoons fresh lemon juice
1/2 teaspoon cinnamon

Cake:
3 cups all-purpose flour
1 cup granulated sugar
1 teaspoon baking powder
1/2 teaspoon baking soda
1 cup cold butter (2 sticks, unsalted)
2 eggs
1 cup buttermilk
1 teaspoon pure vanilla extract

Topping:
1/4 cup brown sugar
2/4 cup granulated sugar
1/2 cup all-purpose flour
1/4 cup cold butter (unsalted)
1/4 teaspoon cinnamon (add more to taste)

Preheat oven to 350 degrees F.  Spray 9x13 glass pan with non-stick cooking spray - set aside.

In a saucepan - combine granulated sugar, cornstarch, apples and lemon juice.  Bring to a boil on Medium High heat and cook until mixture starts to thicken and apples start to soften - approximately 5-8 minutes (use judgement).  Stir constantly to avoid mixture from burning.  Remove from heat and add cinnamon.  Let mixture cool while combining the cake and topping.

In a large bowl - combine the flour, granulated sugar, baking powder and baking soda.  Chop cold butter into small portions and add to dry mixture.  Cut butter into mixture using a pastry blender. In another bowl - beat the eggs, buttermilk and vanilla; stir into butter crumb mixture just until moistened.  Spoon two-thirds of the batter into greased pan.  Top with apple mixture and remaining batter.

For topping - combine brown sugar, granulated sugar, flour and cinnamon in a small bowl.  Cut in butter until mixture is crumbly.  Sprinkle topping over batter.  Bake for 45-50 minutes or until a toothpick inserted near the center comes out clean.  The base of the cake should be golden brown. Cool on wire rack. Enjoy!


Click here for a printable version of this recipe.
Pin It!

Saturday, September 22, 2012

Soup for You

The cooler weather has definitely started to creep it's way into our weekly forecast and I have to admit, I really don't mind! I LIVEEEE for this time of year - my absolute favorite favorite favorite season.  Carl and I have started a variety of fall traditions and they are some of the things that I look forward to year round.

What I also love about this time of year is the return of heartier meals and COMFORT FOOD - oh how I love you!  Apples, Pumpkins, Mac+Cheese, Squash, Beef Stew, Chicken and Dumplings, Pot Pie, Baked Chicken, Pot Roast, Grandma Hoffmeister's Famous Brisket, Soup galore - ahhhh the list goes on and on (and on)!

A few weeks ago, I got to thinking about this delicious beef and barley soup that our friends Ty and Mandy had made for us a few years ago.  She rendered the beef in some duck fat to start and it was absolutely divine.  So scrumptious that I am still thinking about it over 2 years later!

I love soup with barley in it but for some reason I have always been a little scared of attempting it myself.  I happen to see it on sale last week and decided to give it a go.  Here is the delicious result that I am sharing with you today and will be adding to our stockpile of go-to soups from now on.  I took a bit of a lighter approach and used some leftover chicken but I'm sure beef (or beef rendered in duck fat) would be just as tasty.

Enjoy!


Portobello Mushroom Soup with Barley and Chicken

Makes 6-8 servings

1/2 cup pearl barley
4 cups water
1 tbsp butter
1 tbsp olive oil
2 medium onions, chopped
1 stalk celery, diced
4 cloves garlic, minced
2 large carrots, peeled and diced
16oz sliced portobello mushrooms
5 cups low-sodium chicken broth/stock
1 tsp chicken base or 1 chicken bouillon cube
1 cup chopped chicken
1 tbsp fresh parsley, chopped
1 heaping tsp fresh thyme (removed from stem)
2 tbsp lemon juice
sea salt and freshly ground black pepper to taste

Combine barley and water in a large saucepan (soup pot) and bring to a boil.  Cover, reduce the heat and simmer for approximately 40 minutes.  Stir occasionally.

In a large skillet, heat butter and olive oil over medium heat.  Add the onions, celery, garlic, carrots and portobello mushrooms.  Saute for 10-12 minutes until translucent and soft.

Add chicken broth/stock, chicken base/bouillon, parsley, thyme and lemon juice to the large saucepan with barley.  Add the cooked vegetables and bring to a boil.  Reduce heat and simmer for 10 minutes.  Add chopped chicken and simmer for another 10 minutes.  Season with sea salt and freshly ground black pepper to taste.


Click here for a printable version of this recipe.

----------------------------------------------------------

PS:  Billie Hester - I am still waiting to hear from you regarding your winning prize from this post.  If I don't hear back from you in the next few days I will be picking a new winner!
Pin It!

Friday, June 29, 2012

The Best Banana Bread Ever

TGIF! 

Today I am sharing the perfect recipe to make this weekend - The moistest, tastiest, delicious banana bread... EVER!


I know... I know... there are no less than 48098264876500129858 banana bread recipes currently in existence - but this one is really special.  Something definitely worth bragging about.

You just have to trust me that this is as good as I say it is.  You do trust me, right?

The Best Banana Bread Ever

Makes 1 large loaf, two medium loaves or four small loaves

1 1/2 cup flour
1 teaspoon baking soda
1/2 teaspoon salt
1 cup granulated sugar
2 eggs lightly beaten
3 ripe bananas, mashed
1/4 cup butter - melted and slightly cooled
1 - 2 tablespoon(s) cinnamon sugar

Preheat oven to 350 degrees F.  Spray large loaf pan with non-stick cooking spray.

Combine the first 4 ingredients (flour, baking soda, salt and sugar) in a large mixing bowl.

Add mashed bananas and lightly beaten eggs.  Stir until just combined.

Gently stir melted butter into batter. 

Pour mixture into a large loaf pan and lightly sprinkle cinnamon sugar on top.

Bake until a toothpick inserted into the center comes out clean - about 40-50 minutes.

NOTE:  Cooking times are approximate.


If you have an abundance of ripe bananas but are not able to bake with them right away - don't fret!  Did you know that they freeze wonderfully?  Just stick them in the freezer whole and take them out a half hour to an hour before you are ready to bake.

This recipe is an equal opportunity appeal-er (HA) - feel free to mix in anything that suits your fancy.  Chocolate chips, walnuts, almonds, pecans - all taste great ... the possibilities are endless!

I hope you all have a wonderful weekend.  Stay cool!

Click here for a printable version of this recipe.
Pin It!

Tuesday, June 19, 2012

Nutella Brownie Bites with Nutella Buttercream Frosting

A few days ago when I posted about my favorite baking supplies, it was all thanks to these babies I'm sharing with you today.  I love this recipe and it definitely has become my go-to recipe when we are expecting last minute company or when I'm in the mood for some Nutella (besides face planting myself into the entire jar spoonful for spoonful!).  These brownie bites are so incredibly delicious and decadent.  But - the best thing of all... they are only 5 INGREDIENTS!!  That's it - it's fantastic and wonderful and easier than the easiest thing on the planet.

These Nutella bites are really tasty plain but what really throws them over the edge, is the Nutella buttercream that I plop on top.  This is the stuff I dream about!  Rich, sweet and absolutely divine.  I totally know what you're thinking - How can these get any better?!  Right!? (just humor me and spare my feelings and tell me you're thinking that... but really - you are, right?!) - the frosting is only 5 ingredients too!!

I hope I've sold you on how tasty these scrumptious little morsels are.  This recipe cannot be any simpler and I hope you end up loving these as much as I do.

Nutella Brownie Bites
Recipe slightly modified from Savory Sweet Life which was printed  with permission from the original creator:  Abby Dodge  - cookbook author of Desserts 4 Today: Flavorful Desserts with Just Four Ingredients.
 
Makes 24-30 mini brownie bites.
 
1 cup Nutella
2 Large Eggs
10 tablespoons all-purpose flour
1/2 cup hazelnuts, finely chopped
1/2 cup mini chocolate chips

Preheat the oven to 350 degrees F.  Line a 24 well mini muffin pan with grease proof mini cupcake liners.

In a medium bowl - whisk the Nutella and eggs together until well blended. Once blended, add the flour and whisk until there are no clumps.

Stir in chopped hazelnuts and mini chocolate chips.

Scoop into pan lined with mini liners using a 1 tablespoon cookie scoop.

Bake brownie bites until a toothpick inserted into the center comes out clean - approximately 12-15 minutes (NOTE:  Cooking times may vary according to oven variances).

Once cooked, let sit in pan for 5 minutes.  After five minutes, transfer to a wire rack to continue cooling.  Once completely cool, these babies are ready to frost.
 
Nutella Buttercream Frosting
Recipe very slightly modified from Handle the Heat.

1 and 1/2 sticks butter, softened
1/2 heaping cup Nutella
1 teaspoon pure vanilla extract
1 - 2 tablespoons heavy cream
1 cup powdered sugar

Using a mixer (hand or stand) - beat butter and Nutella together until well combined.  Add the vanilla, cream and powdered sugar and beat on low speed until incorporated.  Once incorporated, increase speed to medium-high and beat until frosting is smooth and stable.

NOTE:  I usually have some leftover frosting after using on the Nutella bites - I have found that this frosting freezes really well.
 
You can click here and here for the printable versions of these recipes.

Missed my post on my favorite baking supplies to make these scrumptious treats?  You can find it here.

Make today a great day and go make these babies - RIGHT! NOW!
Pin It!

Sunday, June 3, 2012

Sweet Summertime Jammin'

We're jammin', jammin',  
And I hope you like jammin', too...
  
Strawberry-Rhubarb jam that is.


Oh yeah, I totally went there and you should be happy I did too.

Last weekend, Carl and I traveled to New Hampshire for a visit and I was SO excited to get some fresh rhubarb while we were there.  There has been a recipe I've had thought out in my head for weeks now - I just had to get my hands on some fresh rhubarb first.  Making the jam was the first step towards making this recipe and I can't wait to share both - delicious - recipes with you.  I'm still perfecting/experimenting on the ultimate recipe so in the meantime, let's get making some jam!


Homemade Strawberry-Rhubarb Jam 
[Recipe modified from The Pioneer Woman's strawberry jam recipe which is also identical to the recipe from Ball and many others]

3 cups strawberries, hulled and chopped
2 cups rhubarb, chopped finely
6 cups sugar
4 tablespoons fresh lemon juice
1.75 ounce powdered fruit pectin
small pat of butter (optional - helps prevent foaming)

Place 7 - 6oz mason jars (or 6 - 8oz mason jars) in a large pot.  Cover jars completely with water and bring to a simmer.  In a separate pot, simmer the lids.

Spread chopped strawberries on a cookie sheet and mash with a potato masher until softened.

Place chopped rhubarb, mashed strawberries, lemon juice and powdered fruit pectin in a large pot or dutch oven. Stir mixture until pectin looks dissolved.  Add small pat of butter (just under 1/2 tablespoon) and stir.  Bring mixture to a strong boil.

Once the juice starts to form, add all of the sugar at once and then return to a full (violent) boil.  A full (violent) boil is one that cannot be stirred down.  Cook and continue to stir for 60-80 seconds.

Turn off heat and skim off any foam that may form on the surface of the mixture (if you use butter, you should have minimal foaming).

Remove jars, one at a time, from the simmering water.   Place jar on towel and fill with hot jam mixture.  (NOTE: A large/wide mouth funnel is very helpful here but I don't have one so I just use a measuring cup.)  Fill jars to within 1/4 inch of the top.

Run a knife or a thin spatula around the insides of the jar to get rid of any air bubbles.

Wipe the rims of the jars with a wet cloth or paper towel to remove any jam residue/stickiness.

Remove center lid from simmering water and position on top of the jar.  Screw bands on jars being carefully not to over tighten.

Gently place jars back into pot of gently simmering water, making sure that water completely covers the tops of the jars.  Bring water to a full rolling boil.  Cover and boil hard for 10 minutes.

Turn heat off and leave jars to sit in water, undisturbed, for 5 minutes.

Remove the jars from the pot using a jar lifter/tong and place onto a cloth covered or wood surface, several inches apart, to cool.  In order for the jam to set properly, the jars need to sit undisturbed on cloth/wood surface for 24 hours.  You will soon start to hear lots of little pops as the jars start to seal.

After 24 hours, press the top of each lid with a finger to ensure that the seal is tight.  Lids should have no give.  If any seals are compromised (ie. you can flex up and down), store those jars in the fridge.

Store in a cool, dark area. Enjoy!


Click here for a printable version of this recipe.
Pin It!

Saturday, June 2, 2012

Strawberry-Rhubarb Rickeys

Ahhhhh summer!  I love this time of year - loads of sunshine, longer days, flowers are a bloomin', baseball season is here and the cold drinks are flowing.  I love all things summer drinks and that definitely includes [but is not limited to] lemonade, ice tea, margaritas, beer, Arnold Palmer's, daiquiris and RICKEYS!

Have you ever had a rickey?  If so, aren't they one of the best inventions ever?  
If not, are you kidding me?  Did you not know they are one of the best inventions ever?! 
[I should also mention that Arnold Palmer's are also in contention for the numero-uno best summer drink according to moi award].

Regardless of your answer to the above question - rickeys are so incredibly simple to make that they MUST become a staple in your summer drink line up.

My usual go to rickey is a raspberry lime rickey but after having an abundance of rhubarb this past weekend, my mind went into overdrive and I knew I must run to the store and get some strawberries.  I am a huge fan of the strawberry+rhubarb combo so I decided to give it a go. Boy am I glad I did!

This drink was every bit as refreshing as I had imagined and was a little too easy to drink. Here is my tasty interpretation for you. 

Cheers!

Strawberry-Rhubarb Rickeys

2 ounces Strawberry-Rhubarb simple syrup [recipe below]
2 tsp fresh lime juice
2-3 ounces gin or vodka [optional - feel free to add more or less to taste]
Lemon-Lime flavored Seltzer
fresh strawberries and limes [for garnish]

sugar [for the rim]

Rub the rim of a large glass with a lime wedge and dip in sugar.

Fill glass with ice.

Combine first three ingredients in a cocktail shaker with a few ice cubes and give it a good shake or five or ten.
 
Pour into large glass and top with seltzer.

Stir mixture a few times to combine and garnish with limes and/or strawberries.


Strawberry-Rhubarb Simple Syrup
[Recipe modified from Country Living]
 
3/4 cup(s) rhubarb, trimmed and chopped
1/2 cup(s) strawberries, sliced and chopped
2/3 cups (s) granulated sugar
1/2 cup(s) water

In a 1-quart saucepan, combine rhubarb, strawberries, sugar, and water.

Bring to a boil over medium-high heat; cook until rhubarb is very soft -- about 10-15 minutes.

Cool mixture.  Once cool, place mixture in blender and blend until smooth.

Store in an airtight container, refrigerated, for up to four days.

Click here for a printable version of this recipe.
Pin It!
Related Posts Plugin for WordPress, Blogger...